Showing posts with label recipe. Show all posts

Thursday, March 4, 2010

Today I learned the science of ice cream

Homemade ice cream is a tradition in our family. When I was a kid, Gramma would bring out the old ice cream maker at birthday parties and other summertime special events. She'd whip up the ingredients in the kitchen, pour it in the tall metal cylinder and sit that inside the bucket with the ice and salt. And then The Uncles would all have their chance to turn the crank until their arm felt like it would fall off. And then the cousins would all compete over who got to eat the ice cream off the paddles inside the churning cylinder. And we'd eat our ice cream in the yard until our brains would freeze.

But until today, I did not know about the science behind the process. So grab your scoops and sundae bowls and prepare for a tasty lesson about the science of ice cream!

I made ice cream with two plastic freezer bags
and a depressed freezing point. With stuff around the house.
For this fun project, you need the following:
1 gallon freezer bag
1 quart freezer bag
Ice cubes
Large crystal salt

Ingredients:
1 cup milk -OR- Half and Half -OR- whipping cream
(These vary in creaminess and the amount of exercise required post-ingestion.)
2 tbs. sweetener - you can use regular sugar - I used agave nectar.
1 tsp. flavoring - any kind you like. I went with regular old vanilla.

First you mix the milk, sweetener and flavoring in the quart-sized bag.
Congratuations! You've just created a solution!
(No, not the "problem" kind of solution. Unless you're thirsty for flavored, sweetened milk.)

The solution I'm talking about is a homogenous mixture of two or more substances. *cricket chirp* OK, so science isn't my strong suit, and the first time I read the definition of a solution I was thinking, "Um - What?" (Oh, to challenge my limitations!) I know the everyday meaning of homogenous, and the scientific one isn't much different. Homogenous, in this case, means that these ingredients are now combined in a uniform substance. After you mix it together fully, the components do not settle or separate on their own, i.e. the vanilla won't rise to the top, the sugar won't settle to the bottom. While the milk, sugar, and vanilla retain their own chemical uniqueness, they have come together to create a new substance. When they join together, they create a solution! (Hey, if you need a speech at an ice cream social feel free to take that and run with it.)

And with that little tidbit of information, I now also understand homogenized milk. During that process, the fat molecules that would normally rise to the top and separate from the milk are shot through teeeeeny-tiny holes so that they will be small enough to intermix with the rest of the milk. Here's a link that explains the process. 

So, wait a sec. They infuse the fat molocules into the milk? Hmm. I wonder if that's why the milk with the cream that rises to the top tastes better... It seems I'll have to take my blog on a field trip to the local creamery when the weather gets a little nicer.

Ok, back to the ice cream science...

Next, take your gallon bag and fill it 1/4 of the way up and add 3 tbs. of salt.
I always wondered as a kid why they added the salt. The grown-ups told me it was because it melted the ice. But I found a more in-depth explanation at this site. "When you add salt to the ice, it lowers the freezing point of the ice, so even more energy has to be absorbed from the environment in order for the ice to melt. This makes the ice colder than it was before, which is how your ice cream freezes."

This is also why it's important to salt the roads when it starts to get icy, and why parts of the ocean don't freeze even when they are well below freezing. This site is really interesting and explains it well.

Next, add the WeLL-SEALED bag of milk solution.

And add 1/4 more ice and 3 more tbs. of salt on top.

And now comes the fun part. You shake the bag for about five minutes. This is where you can get the kids involved and make them do the work. They can play catch with it, or hula hoop with it in their hands, or do cartwheels with it in their teeth. Just as long as it keeps shaking. My kids were sleeping when I did it, so it wasn't nearly as entertaining as it might have been. My hands started getting cold, too.

As frostbite started claiming my fingers, I thought it might be brilliant to try sticking it in the washing machine and letting that agitate it. But I remembered it doesn't agitate without water. Then I thought I could toss it in the dryer on air-only cycle. But then I imagined the seals not holding up against such vigorous mixing and then imagined my husband's face when I explained the reason why we needed a new dryer.

"Well, sweetie. I was going to make ice cream . . . "

"Ice cream?"

"Yeah, ice cream."

"What's that got to do with the dryer?"

"Well, I had to keep shaking it, and my hands got cold . . . "

"So you put the ice cream in the dryer?"

"Um, yes. Well, it seemed like a good idea at the time."

"In the dryer?"

"Yeah! Think of all the people that would read a post entitled, 'Today I learned to make ice cream in my dryer.' You have to admit that sounds intriguing."

"As opposed to 'Today I learned how to install a clothesline in my living room because I tried to make ice cream in my dryer.'"

So, readers, be warned that this is the direction your mind can go when your hands start freezing because you are making ice cream in Ziploc bags after everyone has gone to sleep. Fortunately, these thoughts can be easily assuaged by A.) a pair of mittens or B.) a pillowcase. I chose the pillowcase because it was fun to swing around in circles.

Speaking of ice-cream induced mental impairments here's more science as

So, after my five minutes were up, I checked out the bag of ice cream:
I scream - you scream - we all scream for ice cream!

Now you just serve it up. I recommend cutting one of the corners and squeezing it out soft-serve style. And if you have any aspirations of ice cream photography be sure that your batteries are at max power, because sundaes tend to pout if they're kept waiting.

But they are still tasty.

I learned a lot more science about ice cream,
like crystallization, emulsification and pasteurization.
And I learned that ice cream made in a bag
is just as tasty as the stuff from the store.

I'll post my next lessons on Sunday evening
since I'll be offline for a bit.
I'll keep you posted!

*No dryers were harmed in the making of this post.*

Monday, March 1, 2010

Today I learned HOW-TO Make Turkish Delights!

After my drastically failed attempt, and then a LONG evening of dedicated do-over,
I have done it! So here's the learning process in action:

The Ingredients

You know, I learned with this recipe that one of my pet peeves is when recipes lump together a sum of an ingredient when it's actually added in various increments throughout the recipe. I very nearly had 1 1/4 cups of cornstarch in my gluey mixture because of this practice. Who wants to stop and do mental math at a critical juncture of the process when every second counts?

I broke down the recipe for you according to the steps of the process:

To Coat the Pan
extra light olive oil

Sugar Mixture
4 cups granulated sugar
1 1/2 cups water
1 tbs. lemon juice

Jelly (Gluey) mixture
1 cup cornstarch
1 tsp. cream of tartar
3 cups water

Last Ingredient
3 tbs. rose water

Powder Coating
1 cup powdered sugar
1/4 cup cornstarch

This recipe is very close to the last recipe I tried with a few minor exceptions that made a big difference. The last recipe I tried, while quite close to this one, was not as clear in its instructions and contained some inconsistencies. For instance, the video told me I needed 1 1/2 cups of corn starch, the written recipe told me that I needed 1 1/4 cups of cornstarch, the instructions told me to add 1 cup of cornstarch, but that recipe never told me what to do with the remaining 1/4 or 1/2 cup of cornstarch after making the gluey. So one of the most important things I learned is to study the recipe before you ever get started. I probably would have noticed earlier but I was distracted by the video with its cool bop-iddy-bop-bop Middle Eastern music in the background and the tutorial lady's charming accent.
 
Before you start, I would recommend measuring all the ingredients and having them ready to go. You need a larger pan and a smaller pan. Start the sugar mixture in the smaller pan because you'll be pouring it into the larger pan.
 
Step #1 Make the Sugar Mixture
   
Tah-Dah! My lovely new Tramontina stainless steel saucepan!
I'm not getting any endorsements from Tramontina or anything,
(LoL!) but I have to say that they make nice, heavy-duty cookware.
They're thick bottomed, heat evenly and are great quality.

There are some purchases where you can pinch pennies,
but I have learned that a quality product is worth the extra.
Unfortunately, I learned this the hard way...
*Sniffle*
I bought this a month ago because it was a big beautiful shiny wok for my stir-frying.
Be sure to look for stainless steel because the only thing this is good for now
is gonging intruders over the head.
 
Anyway, back to Turkish delight...  
This is the water, lemon juice and sugar mixture over medium heat.
(I began this process at about 10:15 p.m.)
You keep stirring this until the sugar dissolves and it starts to boil.
Then you turn the heat to low and let is simmer
until it reaches 240F on the candy thermometer.
 
This part took MuCH LonGeR than I anticipated.
I probably spent a good hour waiting for that blue vein to rise.
I stood there listening to Enya music and watched this sort of hypnotizing bubble ballet.
 
The bubbles would appear from nowhere within the mixture.
They'd form and then pop up to the surface.
Sometimes there would be little bubble geysers.
I spent a lot of time watching the hypnotic bubbles.
After about an hour of watching the little bubbles and not
seeing any temperature increases I decided my "low" setting was too low,
and that these bubbles were lazy. I turned up the heat and finally got to 240F.
 
Step #2 - Make the Gluey Mixture
Now you mix the cornstarch, water and cream of tartar over medium heat.
I didn't get any photos of this part of the process,
mostly because it was the part that left me wary.
Basically you stir like crazy until it starts to boil.
 After it boils it will start to become gluey.
I found a trick is in the sound of mixture.
Stirring sounds less splishy as it gets thicker.
Early warning signs are extremely helpful to the process
and I'm glad to have tagged this one.
 
Now as soon as it starts to become glue-like you pour the Sugar Mixture
into the cornstarch mixture.
Stir it like crazy for five minutes until it starts to look like this:
Kind of reminds me of the goo from lemon meringue pie.
 
Now comes the labor-intensive part. You stir. And you watch. And you stir some more. And you watch. And you stir until your arm feels like it's going to fall off and you watch until your brain cells will start dying off from lack of stimulation. Having done this solo, I would recommend having someone available to relieve you. About 45 minutes into this part of the process (about midnight) I realized it wasn't really simmering, it was just warm, so I turned up the heat. It probably varies from stove to stove. While I was waiting for it to heat, I became so bored for something to do that I decided to learn how to make lemonade from lemon juice.
 
I was into a rhythm at this point and knew I had about two minutes before it started bubbling and I'd have to stir again. I stirred and ran to Google "lemonade from lemon juice." As soon as I found a recipe, I dashed back and stirred the goo. After stirring, I ran back to the computer and copy-pasted into a word document and popped the Turkish delight recipe print-out in so I could print the lemonade recipe on the back. I printed it and dashed with it back to the kitchen, glad to be done with the back and forth part of it. I looked at the Lemonade recipe:
 
AAAAAAH! OH NO!  
 
No Lemonade Recipe and now no Turkish Delight Recipe! SO back and forth I dashed again until I reprinted the Lemonade Recipe and the Turkish Delight recipe. I used my sugar mixture pan to make the simple syrup, stirring my Turkish Delight every two minutes or so. I added the lemon juice and water it asked me to add, mixed it up and stuck it in a cup with some ice cubes.
 
Ah! What a refreshing-looking diversion.  
Of course when I took a big gulp my face turned to a permanent pucker and
I immediately sprouted 37 chest hairs. Whoo! So, I won't be sharing that recipe with you.
Unless you have some furniture that needs stripping...
 
So, back to the Turkish Delight,
I noticed as I waited that the mixture began to lose its cloudiness
and become much more gel-like and thicker.
It was also harder to stir.
Either that or my arms were giving up on me and going to fall off.
I amused myself by making up songs about life with no arms.
They were quite inspirational, I'm sure.
 
The mixture also became a slightly darker golden color,
and I could tell that it was a lot closer to the consistency that I was looking for, although it said in the recipe when it "has become a golden color"
so I was looking for some sort of notable change.
When I realized that the consistency was right where I wanted it,
my gut told me if I kept stirring, waiting for some color change
 that I would have missed my mark.
 
I added the rosewater and poured it into my prepared pan
and waited for morning to come.
I'm pretty sure I was stirring with an imaginary spoon in my sleep.
I had a dream about stirring Turkish Delight over a fire
in a huge cauldron with a giant spoon.
When I woke up I remembered it was a real spoon I saw in Hakone (Japan).
 
Waybums is in this picture, too. Sort of. Behind the spoon.
 
And then came the morning!
It looked perfect and gelled. So I followed through the rest of the recipe.

Turning it on a surface was easy.
I would recommend a light layer of olive oil to keep it from sticking.

Close-up of the Delight and its waxed-paper wrinkles.

Coat in cornstarch and powdered sugar...
Be sure to mix the cornstarch and sugar well first.
 
Turkish Delight!

I tasted a piece after I had them all powdered and put away.
I was most surprised at how smooth and creamy they are.
Yum-may!

So, I gave my sample plate to the most discerning palate in the house.
She took a bite and regarded the candy.
And then declared it "the best most tasty ever in the world."

Even our house-rabbit Jazzy tried to steal a piece.
I thought he was going for the rose petals but he hopped away with a candy in his mouth!
Hmm. Related to the Easter Bunny?
 
Waybums suggested all the flavors she'd like to try.
Cherry. Strawberry. Orange.
You can make it any flavor you want.
As it is, it tastes like a rich honeyish lemon flavor.
 
This recipe can be found here.

So, all-in-all not a bad experience. Turkish delight dates back to 1500s so it's kind of cool to make an ancient candy recipe the traditional way. I won't be making it every day, but I can definitely see making it again for special occasions. Waybums has already put an order in for her birthday.
 
I know you had to wait a while for me to post this lesson, but one great thing I learned from this experience is that whether something turns out or it doesn't, waiting for the outcome will at least grant you more patience.

And Tramontina - feel free to have your people call my people. ;)
 
I'll keep you posted.

Sunday, February 28, 2010

Bonus Post - I learned how to make eggs from scratch

Here's the link for Waybums' YouTube Tutorial


Today I Learned How NoT to Make Turkish Delight

-Lesson from Saturday, February 27, 2010-

If you don't know what Turkish Delight is, you should check out the following video link:

*Sigh* - It looks so tasty. Now, on to the lesson.

You know...there are moments in life that you can look back and revel in your great success, in your achievement and the glory of that moment.

And there are moments like these when you begin to wonder if the Frankencandy you created will ever release your teeth from its powerful grip. Will I be forced to suck my nutrition from a straw for the rest of my life? How can something so tasty be so evil? Can you die from laughing this hard? Sometimes trying to learn something will just leave you with more questions...

I have been excited for days now about the possibility of making Turkish Delight. I even made rose water from scratch in order to make it. But, unfortunately I did not learn the proper way to make Turkish Delight today. That's not to say that I didn't learn anything today. Quite the contrary. I learned how NoT to make Turkish Delight today. Probably one of many ways. Although I prefer not to learn any more.

I'm not a big Woody Allen fan, but I read one of his quotes recently that could certainly apply to this situation:

"If you’re not failing every now and again, it’s a sign you’re not doing anything very innovative."

So, in reviewing this process I will take comfort in the idea that at least I tried to do something interesting, and can move forward with the information I've gained and apply it to my next attempt.

~~~~~~~~~~~~~~
Here is how you're supposed to make Turkish delight...

Step #1 - Mix sugar, lemon juice and water together and heat until 240F.


What did I learn from this?

1. Wire whisks and Teflon pans do not mix.
2. I am overdue to buy a new medium-sized saucepan.
3. Teflon flecks are not an appetizing ingredient.

So, after scrapping that batch of ruined sugar mixture, I went on to mix up a better one, in a better pan. Going good. For the moment anyway. Until I faced the next step.

Step #2 - Mix cornstarch, cream of tartar and water over heat until it's glue-like.


Now, the directions said,
"when the mixture achieves a glue-like consistency, stop stirring."
I think this was the major hitch in our attempt today.

In the recipe video, their mixture looked like a thicker version of Elmer's glue.
Now that I look at theses pictures I realize that ours looked more like
the school paste that comes with an orange lid and a stick.


What did I learn from this?

1. Gooey and gloppy is better than pasty and thick.
2. This stuff may look like frosting, but is NOT tasty. Bleh.

Step #3 - Add gluey mixture to sugar mixture.

What did I learn from this?

1. If it's pasty, the mixture turns into hard little flecks the consistency of cartilage.
2. No amount of stirring will fix this.

At this point, I was torn. Do I follow through with the rest of the recipe even though I know this batch is ruined? Do I scrap it all and start over? It was time to call My Reinforcement back to the kitchen.You remember the guy . . . Super Hubby

His solution was simple.

"Let's just strain out the flecks."

I laughed out loud. Pouring molten hot candy through a sieve? First of all, that sounded dangerous. Second of all, it didn't even seem like it would work. But he smiled confidently at me, with a "What do we have to lose?" expression.
Ok. Alright. Let's give it a try...


What did I learn from this?

1. Sometimes crazy ideas work.
2. Sometimes crazy ideas work, but it still doesn't matter.
3. My husband is willing to sustain injuries to find out what Turkish delight tastes like.


No wonder Edmund was willing to betray his brother and sisters.
The intrigue of this stuff makes you do crazy things...

Well, we continued to follow the directions. We were aware that it might not turn out as planned, since a good portion of the gluey mixture didn't get integrated into the batch. But we marched on, anyway. And after the long stirring time was done we poured it into our pan and hoped for the best.


After the cooling time had passed we tried it.

Instead of being jelly-like and soft,
we had made the largest Sugar Daddy I'd ever seen.

And even though it glued my teeth together, it tasted really good.
I'll keep dreaming of what it will be like to bite into a soft jelly Turkish delight.

Until then, I'll keep you posted.

Thursday, February 25, 2010

Today I learned to stop and eat the roses.

I love roses. They are just classic. They smell nice. They look beautiful. They remind me of summer. My oldest daughter's middle name is Rose. (We gave our little one a floral middle name, after we adopted her. We'll probably have a whole garden by the time we're done having kids.)

Anyway, this is usually what roses do in my house:

Sit there and look purdy. Purely decor.
Until today.

Spoiler Alert - On Saturday I plan to learn how to make Turkish Delight. You know, the "sweetie" that Edmond betrayed his siblings for in The Lion, the Witch and the Wardrobe. When I was a little kid and read the book, I always wondered what it tasted like. So I plan to make it this weekend to appease my curiosity. One of the ingredients is rose water. I looked around quite a bit for rose water locally, and did not find it. Normally that sort of thing would have left me shrugging that maybe I'd find it someday and then be able to make it. But now that I am challenging myself to learn new things, I was just excited to have another new thing to learn. What is rose water? How do you make it? Off to learn, I went!


What is Rose Water?

Basically, it's water that's been infused with the smell and flavor of rose petals. Rose water is probably one of the oldest perfumes in the world. It's not like the heavy rosy perfumes or soaps that you're probably thinking of. It's much more delicate. Romans used roses in their baths and noticed the astringent qualities, and those are the purposes it's most known for here in the U.S. - as as a body mist or as a facial astringent.

However, rose water has also been a staple for cuisine in the Middle East for a very long time, in savory dishes such as mutton or sweet - as in Turkish delight or marzipan. When we lived in Japan I remember seeing rose petals and dandelion leaves in a salad at a fancy restaurant. And I've found an English recipe for rice pudding that uses rose water. But flowers just aren't really found in food here in The States like they are in other places of the world.

How Do I Make Rose Water?

There are different methods for different purposes. The method I chose was for culinary rose water, and the first task is finding suitable roses. If you are eyeballing your drooping Valentine's bouquet I suggest you forget that route. Most roses in such bouquets have floral preservatives and probably pesticides and wouldn't be suitable for eating. The best place to look would be your own rose bushes since you know what has and hasn't been used on them. But since it's winter here now, you can contact your local florist and ask them if they could get some organic roses. They have more contacts than you might. Unless you are a florist. Hello to all you florists out there! (Especially Jean!) I was able to score two roses locally that were pesticide-free. You can also ask about getting misfit roses with missing petals or broken stems for a discounted price.

My Wonky Rose

Step #1 - Remove the petals from the stem

The easiest way to do this is cup the rose in your hand at the base and pull them down to a right angle. It takes a lot less time than the loves-me/loves-me-not way of doing it. You will need to put the petals in a colander and rinse them in cool water. I did that after I measured:

You need one firmly-packed cup of petals (about two roses).
And two cups of distilled water.

Put your petals in a bowl.
Put your two cups of water on to boil.
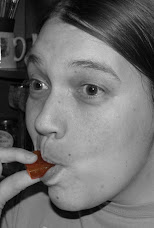
You can go ahead and snack on a petal while you're waiting, if you want.
I'd suggest taking off the white part of the petal first, as it's somewhat bitter.

Waybums is a regular aphid.

Pour the boiling water over the petals and let it steep until the water is cool.
The petals will turn a different color as their pigment transfers to the rose water.
Ours turned almost purplish-pink.

Now, pour through a strainer.
You can squeeze the petals over the strainer for extra essence.

Now, funnel your rose water into a sterilized container.
I used this one because I like recycling and it seemed an appropriate match:
It will need to be refrigerated to stay fresh,
or you can freeze it into 1 tsp. cubes if you need it to last longer.

If you want, you can also use this culinary rose water as a body mist.
You could even use it as an air freshener.
Just put it in a spray bottle and spritz away.
Just remember to refrigerate it,
or to add 1 tbs. of rubbing alcohol as a preservative
if it's not going to be used for food.
~~~~~~~~~~~~~~~~
NOW, what to do with those blanched rose petals?
I hated the idea of throwing them out. During my research into rose water I found a scone recipe with shredded rose petals in it. But when I searched for it again, I couldn't find it for the life of me.

So, I just made one up!

Rose Petal Scones with
"Roseberry Razz" Icing
You know how when you cut onions your hands smell funny afterward?
Oh, the delight of dicing rose petals! :)

I'm the type that likes a recipe to follow, but since I'm eating flowers today and moldy cheese yesterday, I decided I might as well live a little on the wild side. I looked at about a dozen scone recipes so I could get the basic format and then I pieced together bits from each that I liked. Here's what I came up with:

5 cups flour (all-purpose)
2 tbsp. baking powder
1 tsp. salt
Two sticks of unsalted butter,
(still cold and it helps to cut them up a bit)
3/4 cups sugar
1 1/3 cup milk
1 cup shredded rose petals
2 tsp. almond extract
2 tsp. rose water
(You could add fresh raspberries or 1 tbs. of raspberry jelly if you like, too.)
The almond extract is kind of my signature ingredient. I LoVe almond extract. I put it in everything from hot cocoa to chocolate chip cookies. My husband thinks it has a very strong flavor and the second he walked in the door tonight he said something like,

"Went a little wild with the almond extract, did we?"

It was the one thing I remember seeing in the original rose scones recipe that I can't find. But, if you prefer you can use vanilla or raspberry or whatever flavoring you think would be good. I have to say it's pretty good with the almond extract, though. Adding it made sense to me since rose water and almond paste are co-ingredients in marzipan.

You mix together the flour, baking powder and salt and then cut in the butter with a pastry blender. (Or a fork. I'm just excited to have a pastry blender and enjoy getting to use it when the occasion comes up.) Then add the sugar, rose petals, milk, almond (or whatever) extract. Stir them a bit until it starts to form a dough. (If it's still crumbly add a little bit more milk until it's just starting to be doughy, but not sticky.) Turn out the dough on a floured surface and knead it a dozen times or so. There are two schools on scone-shapes. There are round, biscuit-like scones and there are wedges. I made wedges. If you want to make circles, just roll them out and use a biscuit cutter or upside down cup and cut them like biscuits. If you want to make wedges, divide the dough into four equal parts and make them into circles like so:

Now, put them on an ungreased cookie sheet and slice them like you would a pizza.
You can even use a pizza cutter, if you like.
Leave the slices together if you like moist edges,
or separate them a bit if you want them crispy.
Bake them at 425F for about 12-15 minutes until they are golden brown on the top.

For the "Roseberry Razz" Icing
(which my husband named)
4 1/4 cups powdered sugar
3 tbs. butter
1 tsp. vanilla
3-4 tbs. rose water
1 tbs. raspberry jelly (seedless)
Blend together until smooth and then spoon over scones.
(This is kind of an estimate since I didn't measure as I made it...)


A rose by any other name would smell as sweet...
And wrapped inside a lovely scone -  it is a tasty treat!

Ok, so I'll keep my day job. :)

This blog is really helping me to see things in new ways, to think outside my little "known" box and branch out into new places of creativity and resourcefulness. Man, I'm having fun. And thank you, readers for tagging along with me as I go...

~~~~~~~~~~~
PS - I did learn how to make paper cranes today. Although, Waybums thought it was a flying dinosaur. I thought it looked sort of like a crane. Maybe one that had been gnawed on by an origami predator...

I've just learned this is a skill I'm going to have to practice.


~~~~~~~~~~
I'll Keep You Posted!