


Have you ever made a cake from scratch? Because until today, I was a cheater. I always bought the cardboard boxes with the easy "just add eggs water and butter" instructions. But you know what I learned today? Making it from scratch is not only beginner-lever easy. It's also WAY less expensive. (And even more tastier. And yes, I know that "more tastier" is not approved English, but when you're recovering from eating something this tasty it's hard to remember such frivolous things.)
A box of chocolate cake mix can cost anywhere from $1-5, depending on the brand and the store. The cost of the base ingredients used for making one cake is practically pennies. Which means that Mrs. Crocker is a con artist. She and Mr. Hines probably got together one day and chuckled fiendishly, "We can make a billion-zillion dollars by packaging the dry ingredients in a cake and selling it in the name of convenience! Mwah-haha!"
I have made cookies and homemade bread and baked all sorts of things, but I never really even thought about making a cake from scratch until I dared myself to learn how yesterday. I set out to make two cakes today from the Better Homes and Gardens Cookbook - 75th Anniversary Edition. - I figured they must know what they're doing if they've been making cake since my Grampa was five.
The first is a basic "One-Bowl Chocolate Cake" with "Ganache" topping.
Here are the ingredients:
 1 cup flour
1 cup sugar
1/2 cup cocoa powder
1/2 tsp. baking soda
1/4 tsp baking powder
1/4 tsp. salt
3/4 cup milk
1/3 cup oil
1 tsp. vanilla
1 egg
The first step is to grease and flour the pan. I'm not proud of this, but I confess that I have skipped over recipes before that have asked me to flour the pan. I know, I know. But since this is a learning experience it's only fair to share the gritty details. It's not that hard, once you figure out the trick.
Step #1 - Grease the pan.
Step#2 - Put a tablespoon of flour in and knock it around until everything you want to be covered is covered and then pour out the extra. All that intimidation for nothing. See?
 (Tah-Da! Look, Ma - just like in the pictures!)
 I had to include this because Waybums was puzzled
 at the rubber-bottom bowl.
"Does it bounce?"
"Um, no. Actually it keeps it from slipping around when you stir."
"Oh. But it would be cooler if it bounced..."
"Does it bounce?"
"Um, no. Actually it keeps it from slipping around when you stir."
"Oh. But it would be cooler if it bounced..."
 OK - back to business.
 First preheat the oven to 350F. Now, you put all the ingredients into a bowl, except the egg. And you mix them together. The recipe says to use a mixer, but I'm kind of traditional and I like to use a whisk. I like to pretend it counts as exercise.
 Then, when it's all smooth, you add the egg. And mix again.
 I don't know why.
Maybe there is some sort of cooking chemistry involved.
Or maybe they just thought it would help you feel more accomplished if they added an extra step.
Who knows?

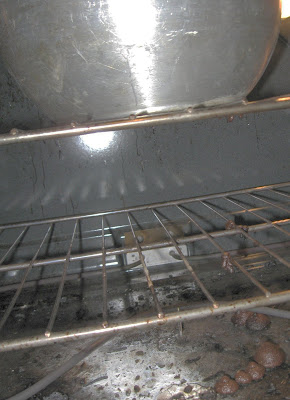
Pour it in your pan and slide it in the oven.
It's pretty fool-proof right?
Well, unless you try to get fancy and use a vintage angel-food cake pan.
That your mom gave you...
*Sniff-sniff* What's that smell?
 Thanks, Mom, for giving me pan with incontinence problems. LoL!
 I laughed so much. Another lesson learned...
MAKE SURE YOUR INSERT IS NOT CROOKED.
 Although it's MuCH shorter and more sloped than I had planned,
 it's none the worse for the wear.
Although a little trickier to get out of the pan...

And now that it's out of the pan on the wire rack, it's time to make ganache.
Besides sounding all cool and Frenchy, ganache is chocolate ambrosia.
So creamy and...oh-so-DEE-VINE. It's also really easy to make.
Bring one cup of whipping cream to boil (medium-high).
Take it off the heat and add in 12 oz. of your favorite chocolate
Like so:
 Then let it sit like this for five minutes before you stir it.
 After you whisk it until smooth, you let it sit another 15 minutes
to cool before you start spooning it over your cake.
The book recommends putting it on a wire rack so that the excess ganache can drip off.
Spoon!

Ok, I am laughing pretty hard at this picture.
This is not the bottom layer.
This is what's left of the cake after the rest
This is what's left of the cake after the rest
oozed out of the bottom of the pan.
Instead of my envisioned double-layer cake, I've made....
 A GIANT DOUGHNUT!
Instead of my envisioned double-layer cake, I've made....
 A GIANT DOUGHNUT!
  LoL - The best-laid plans of mice and men...
But, aside from the technical difficulties, it was a great recipe and
there is very little of that mutant doughnut left.
I'll add "make a double-layer cake" on my "to-learn" list for a future episode.
The next cake I made turned out perfectly, without any mutations.
Yay. :)
If you want the recipe, I'll be happy to post it. Here's the short of it -
Pineapple Upside-Down Cake Ingredients It's really surprisingly easy, too. Just melt the butter and mix with the brown sugar, arrange the fruit in the bottom. Then mix all the cake ingredients together and spoon it in:
 It's really surprisingly easy, too. Just melt the butter and mix with the brown sugar, arrange the fruit in the bottom. Then mix all the cake ingredients together and spoon it in:
 Like so...and then it only take half an hour to bake.
  Invert on plate. Add a turtle for garnish - et voila!
 ----------
Speaking of my mascot turtle, that's something else I learned today. One reader, a long-time friend, suggested that it being a "jaded turtle" it should have an Asian-influenced name. So I found a list online that translates "turtle" into most of the languages of the world. (For you Kung-Fu Panda fans, Uguei means "turtle" in Chinese.) Since Uguei is already taken, I've decided on Skilpad, which is Afrikaans for turtle. Plus it sounds like a good blog-mascot name.
------------
So, Skilpad the Jaded Turtle, it is.
Someday we may delve into the mystery of how he became so jaded...
------------
Tomorrow, I will be playing with fire. Or at least heat. It should be interesting...
I'll keep you posted.


1 comment:
It really does look like a giant doughnut, but it looks absolutely delicious!! Great post! :)
Post a Comment
You put your input in! You take some insight out! You put your input in and you shaaake it all abooout...